How to Repair Damaged Glaze on Ceramic Tiles?
Ceramic tiles are a popular choice for floor and wall decoration due to their beauty and practicality. The glaze on these tiles not only enhances their beauty, but also provides essential properties such as water and stain resistance. However, over time, glaze can become damaged by a variety of factors, including impact, abrasion, chemical exposure, and temperature fluctuations. Repairing damaged glaze is essential to maintaining the appearance and integrity of the tile. In this article, we will discuss the common causes of glaze damage and provide a step-by-step guide on how to effectively repair glaze.
Common Causes of Tile Glaze Damage
Heavy object impact: Accidentally dropping heavy objects or moving furniture may cause scratches, chips or cracks in the tile glaze.
Frequent wear: High traffic areas with heavy foot traffic can cause the glaze to wear over time, causing dullness and scratches.
Chemical corrosion: Using harsh cleaners or improper cleaning techniques can corrode the glaze, causing it to lose its gloss and discolor.
Temperature changes: Extreme fluctuations in temperature can cause the tiles to expand and contract, which may cause cracks in the glaze.
Steps to Repair Tile Glaze
Repairing damaged tile glaze can be done with just a few basic materials and tools. Follow these steps for an effective repair:
1. Prepare materials and tools
Before you begin the repair, please prepare the following materials and tools:
Tile patcher or grout: Choose a patch designed for tile to ensure color and texture compatibility.
Fine sandpaper: Use sandpaper with a grit of approximately 1000 to smooth the surface.
Cleaner: Use a mild cleanser to clean the damaged area.
Sponge or soft cloth: For cleaning and polishing.
Small brush or plastic scraper: For applying the repair compound.
Wax or sealant (optional): Protect the repair area.
2. Repair steps
Clean up the damaged area:
Wash the damaged area with a mild detergent and water to remove dust, dirt and any contaminants.
Make sure the area is completely dry before proceeding, as moisture will prevent the repair compound from adhering.
Grind the damaged surface:
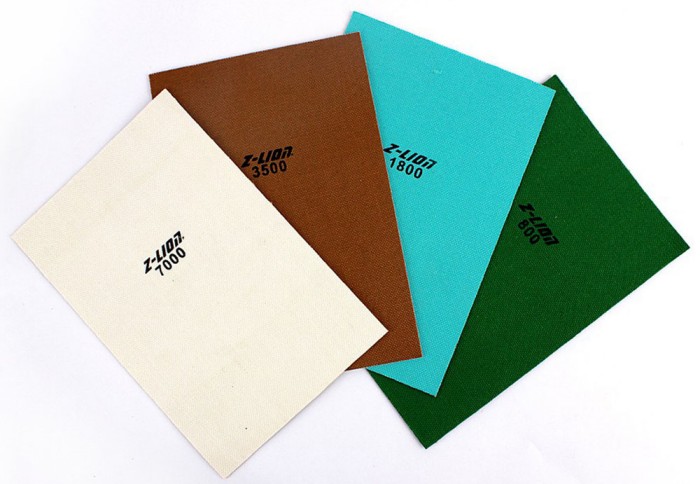
Use fine sandpaper to lightly sand the damaged glaze. This will help remove loose tile fragments and any sharp edges, creating a smoother surface for the repair.
Apply repair agent:
Use a small brush or plastic scraper to evenly apply the repair compound to the damaged area.
Make sure the patch fills all cracks and holes and matches the color and texture of the surrounding tiles as closely as possible.
Smooth repair:
While the repair compound is still wet, use a spatula to gently smooth the surface so that it is flush with the original surface of the tile. This step is essential to achieve a seamless finish.
Wait for drying:
Follow the manufacturer's instructions for drying time. Typically, the repair should be allowed to dry completely, which may take about 24 hours.
Grinding and polishing:
Once the repair compound has dried, use a finer grit sandpaper to lightly sand the area until smooth.
Then, buff the repaired area with a soft cloth or sponge to match the sheen of the surrounding tiles.
Sealing (optional):
For added durability, consider applying a thin coat of tile sealer or wax to the repaired area. This will help protect the repaired area from future damage and improve the overall appearance.
Tips for Repairing Tile Glaze
1. Toothpaste and baking soda:
For minor scratches, a simple home remedy is to mix toothpaste and baking soda.
Make a paste and dip a soft cloth into the mixture. Gently rub the scratched area in circular motions and then rinse with clean water. This method can help restore the glaze's shine.
2. Nail polish:
If there are small chips in the glaze, clear nail polish can effectively solve the problem.
Apply a thin coat of clear nail polish to the damaged area. The polish will fill the crack and create a smooth protective layer on the surface, helping to prevent further damage.
3. Crayon repair:
For darker colored tiles, you can use a crayon that is close to the color of the tile.
Apply the wax crayon to the damaged area and gently heat it with a heat gun. The heat will melt the wax, causing it to fill in cracks and create a smoother surface.
How to Prevent Damage to Tile Glaze?
Use a carpet or mat: Place rugs or mats in high traffic areas to reduce wear and tear caused directly by foot traffic. This helps protect the tiles from scratches and dulling.
Furniture protectant: Install protective pads on the bottom of the furniture legs to prevent scratches when moving the furniture. This simple additional measure can significantly reduce the risk of damage to the glaze.
Regular cleaning: Clean the tiles regularly using a mild detergent. Avoid using acidic or corrosive cleaners as these can damage the glaze over time. Gentle cleaning methods will help maintain the integrity of the tile surface.
Avoid extreme temperatures: Try to avoid exposing the tiles to extreme temperature changes, such as direct sunlight or placing hot objects on the surface. Sudden temperature fluctuations can cause the tiles to expand and contract, which can cause the glaze to crack.
In Conclusion
Repairing a damaged tile glaze is a simple process that can significantly improve the appearance and lifespan of your tile surface. By following the steps above, you can effectively restore the beauty of your tile and prevent further damage. Prompt repairs will not only enhance the aesthetic, but will also ensure that your tile continues to provide the water and stain resistance it is known for. With a little effort and the right materials, you can keep your tile looking great for years to come!
-
Online service
-
Official wechat account

-
QQ:844389055
-
E-mail:VIP@zliontools.com
Online Message
Please feel free to give your inquiry in the form below. We will reply you in 24 hours.